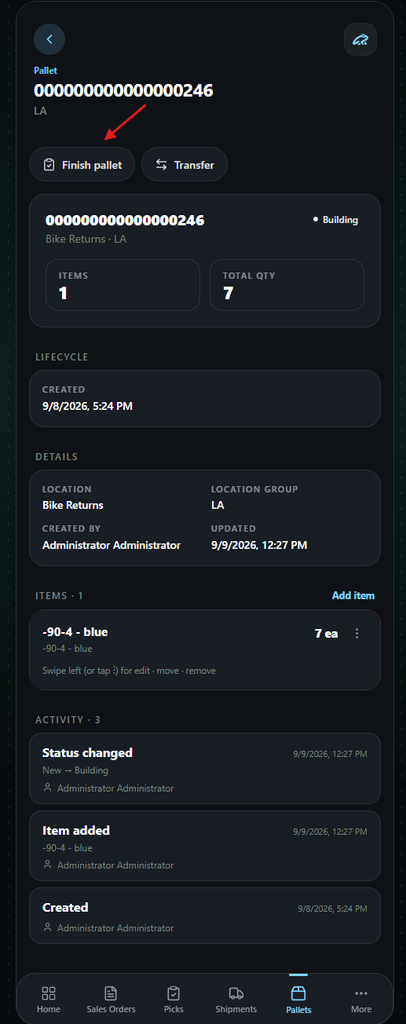
The Pallets module is an integral part of LilyPad Warehouse Management, where you can build and manage the pallets you have created.
- The Pallets module can be found under the Inventory section or at the bottom of the Lilypad screen.
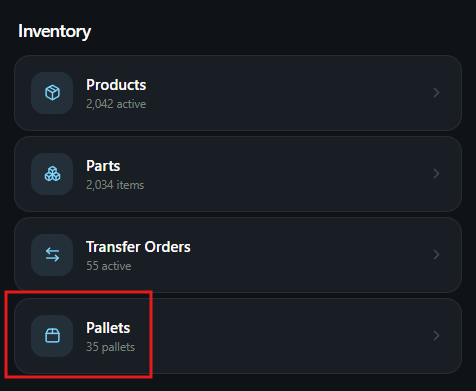
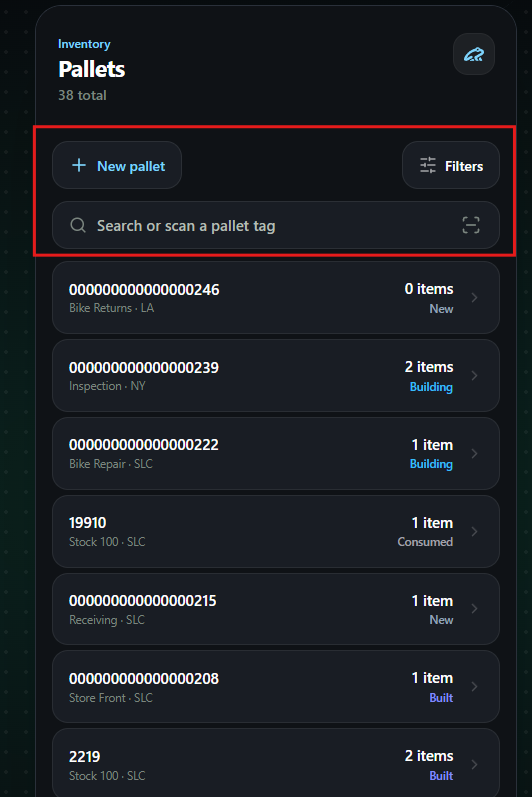
When users navigate to the Pallets screen on Lilypad they will see the main page showing a list of current pallets.
From this screen, users can select to Search, Scan, or Create new pallets.
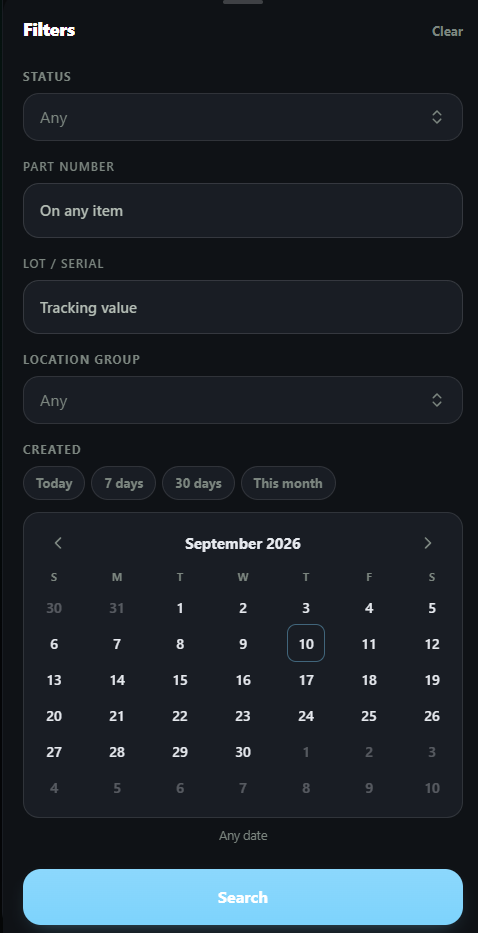
- Users can also use the Filters drop down to search for pallets by specific statuses, parts, tracking information, locations, and dates
Pallet Management #
You can create pallets in many places throughout LilyPad, including the Pick, Receive, Work Order, and Pallet modules.
Unique pallets can be made for any number of parts, be it a pallet for one item or for dozens.
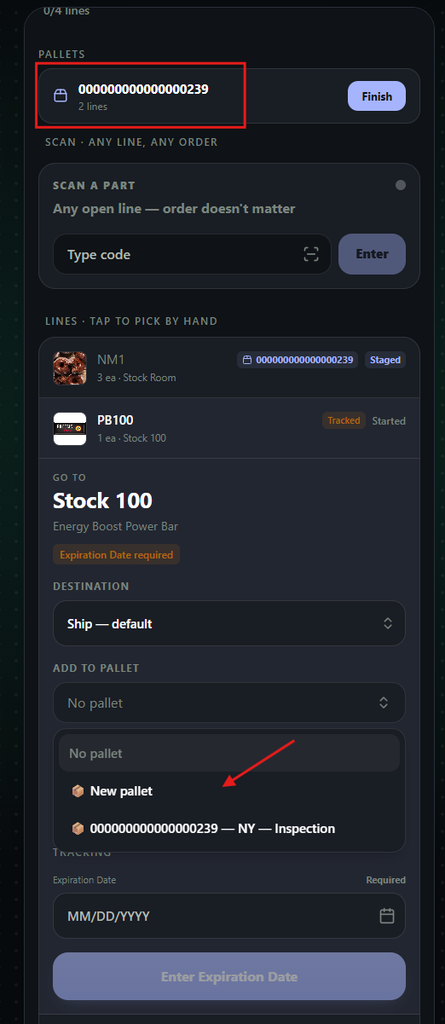
For example, when in a Pick, users can choose to add parts to an existing or new pallet.
- If users create a new Pallet, they will see it as an option on top of the pick screen and it will become an option to add other parts from that pick to it.
- Users can finalize the pallets they have created by selecting the “Finish” button at the top of the screen.
Select the pallets you have created to view and edit them, or create new pallets directly on this screen.
Pallets are tracked by their status in LilyPad. Each pallet is marked as building, built, or consumed, so you always know its current status:
- Building — A pallet was in the process of being created but could not be saved (e.g., not enough inventory).
- Built — A pallet was created successfully but has not been used yet.
- In Transit — The pallet is currently packed and in the process of being shipped.
- New — newly created pallets that have not been saved yet.
- Shipped — The pallet has been completely shipped.
- Received — The pallet has been fully received.
- Consumed — All inventory on the pallet has been completely used. You cannot edit a pallet in the consumed status.
Creating and Editing a Pallet #
Once you are in the Pallet module, select the New Pallet button to start creating a new pallet, or select an existing pallet in the Built or Building status.
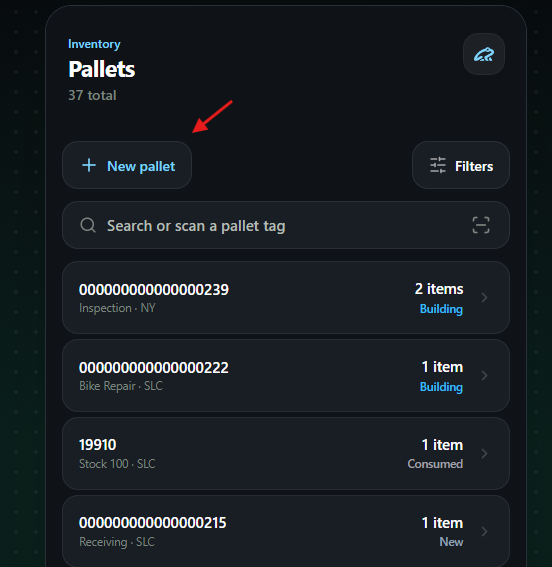
Clicking the New Pallet button will open up the Pallet creation page.
From this page users will have to enter in a location for the Pallet and they can add their own pallet number (SSCC) or leave it blank for the system to use the next available pallet number.
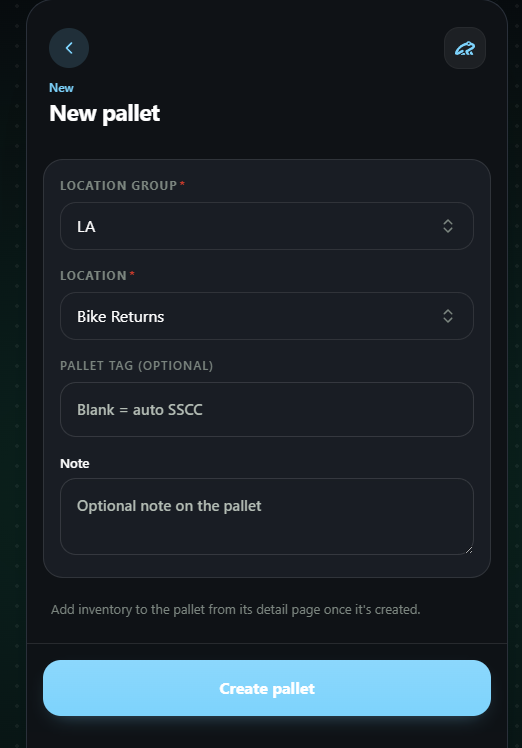
After the pallet location is set and the Create Pallet button is selcted, users will be taken to the main pallet page.
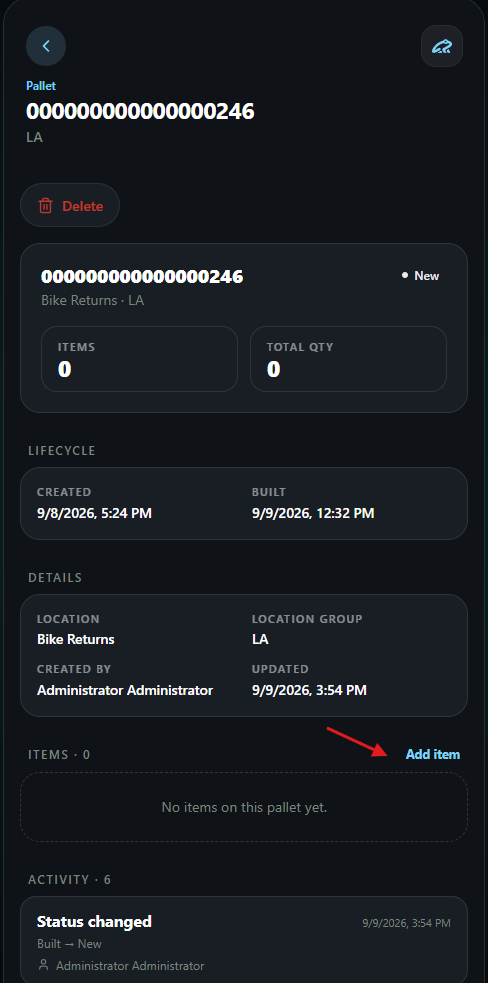
This page will show the current items, activity, and history of the pallet. This will let users know who created the pallet and when it was last updated / changed.
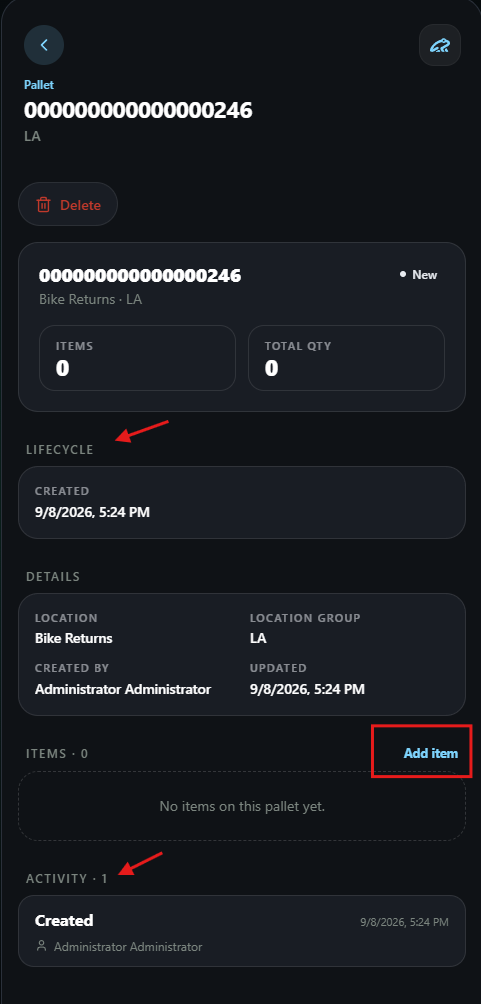
- Lifecycle will show
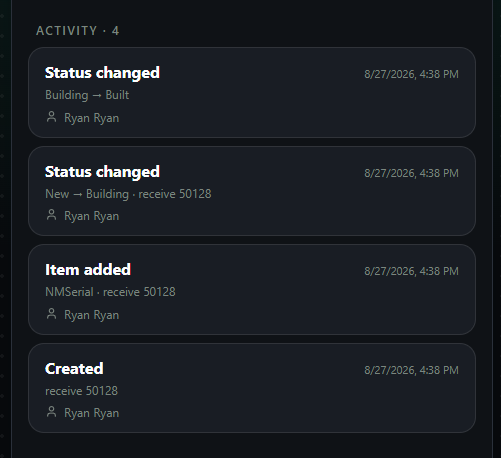
- The Activity section will display changes in location, items, and tracking so users have a clear view of who, when and what was changed with the pallets.
From the main pallet page, users can choose to add items to the pallet by selecting the Add Item link.
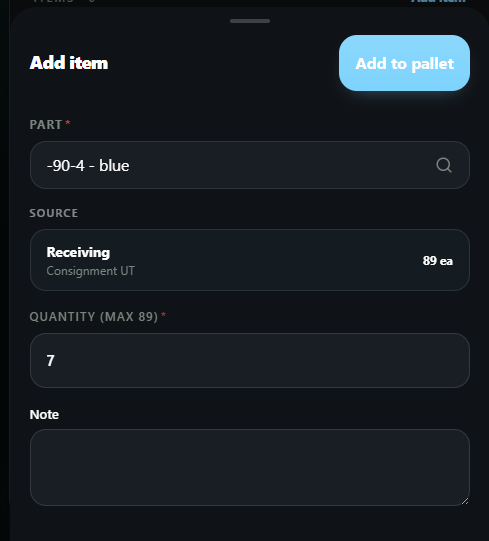
When users select the Add Item link, they will get a pop-up on the bottom of the screen.
From this pop-up, users can search for products and choose the Source (where the inventory is being used from for this pallet).
- Users can then choose the quantity and add the item to the pallet.
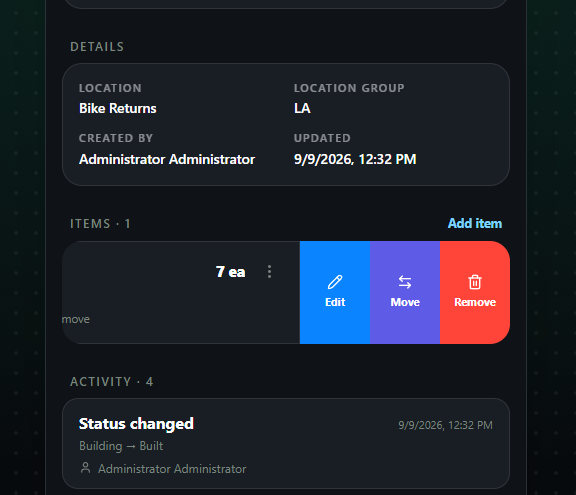
Items already put on the pallet can be edited with the swipe of a finger. By Swiping Left on an item, users can edit the location or quantity, move to a new pallet, or remove the item.
Once the pallet is ready, and all items are added to it, users can select Finish Pallet at the top of the screen.
Users also have the option to Transfer the pallet to a new location at the top of the pallet page.